

It had become a long running joke with my wife Ellen, and her best friend Naomi, who has been coming over for socially distant weekend visits ever since lockdown began in March. When Nay would arrive most Saturdays around noontime, she’d find me outside with my head stuck under the dashboard of my 2012 R56 MINI Cooper and she’d ask Ellen if I was ever going to finish my car project. Truth be told, it really wasn’t ‘one’ car project that I undertook during my summer of Covid, but several automotive upgrades. The focus of this post however, is the installation of two transceivers to create my new mobile “ham shack.”
A SIMPLE PROJECT EVOLVES
It all started when I decided to replace a blown factory speaker. Well, speakers are sold in pairs and why upgrade the front speakers only? Soon a package arrived from Crutchfield with a complete set of premium aftermarket speakers.
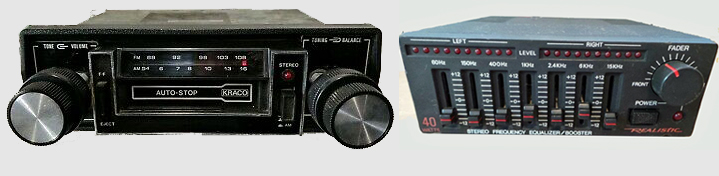
Replacing the speakers took me back to my teen years when I installed that Kraco Dashmsater AM/FM/MPX stereo that I bought at K-Mart for $30 in my Ford Pinto along with matching 5″ Kraco slimline speakers mounted in the cardboard rear deck. That Christmas mom & dad made my holiday by getting me the Realistic 40-watt amplifier and graphic equalizer complete with 7 sliders and flashing LEDs that I ‘needed’ to complete my ride! (You can bet your figgy pudding that I was outside right after Christmas dinner in the subfreezing weather with my wire cutters and electrical tape racing to complete my hi-fi upgrade before sundown!)
So feeling nostalgic, I didn’t stop at the speakers and soon a reasonably priced Kenwood eXcelon DPX594BT double-DIN stereo had also arrived from Crutchfield with bells & whistles that I couldn’t have imagined in my Kraco Krankin’ days – SiriusXM, Pandora, Spotify, Alexa, Bluetooth, USB, a CD player and of course good ole AM/FM.
The second-generation MINI Cooper features a big ole Speedometer in the middle of the dashboard and the bottom half of that speedometer is where MINI incorporated the factory radio display and memory buttons. The aftermarket stereo dash kit came with a blank out panel for the factory display and buttons, but this left sort of an unfinished empty look right in the middle of the dash.
And this my friends, is where the inspiration came in. That big empty space looked like prime territory for a transceiver faceplate. A couple of years ago I purchased a Yaesu FT-891 with the intention of building a Go-Box that I hadn’t done anything with. I saw that the Yaesu remote head and mounting bracket could neatly be attached to the speedometer blank out plate and this would be an excellent use for the space. The ‘bug’ bit hard and before you knew it, I was all in on making this happen.
HOW IT ALL CAME TOGETHER
I decided to install not only the HF rig, but also my Alinco dual band UHF/VHF DR735 and I began the project by bolting both radios to the back of the rear passenger seat, with plenty of slack cable so the rear seat could be folded down. I routed the control head cables under the door sills under the edge of the carpeting and on up to the dashboard. So far, so good.

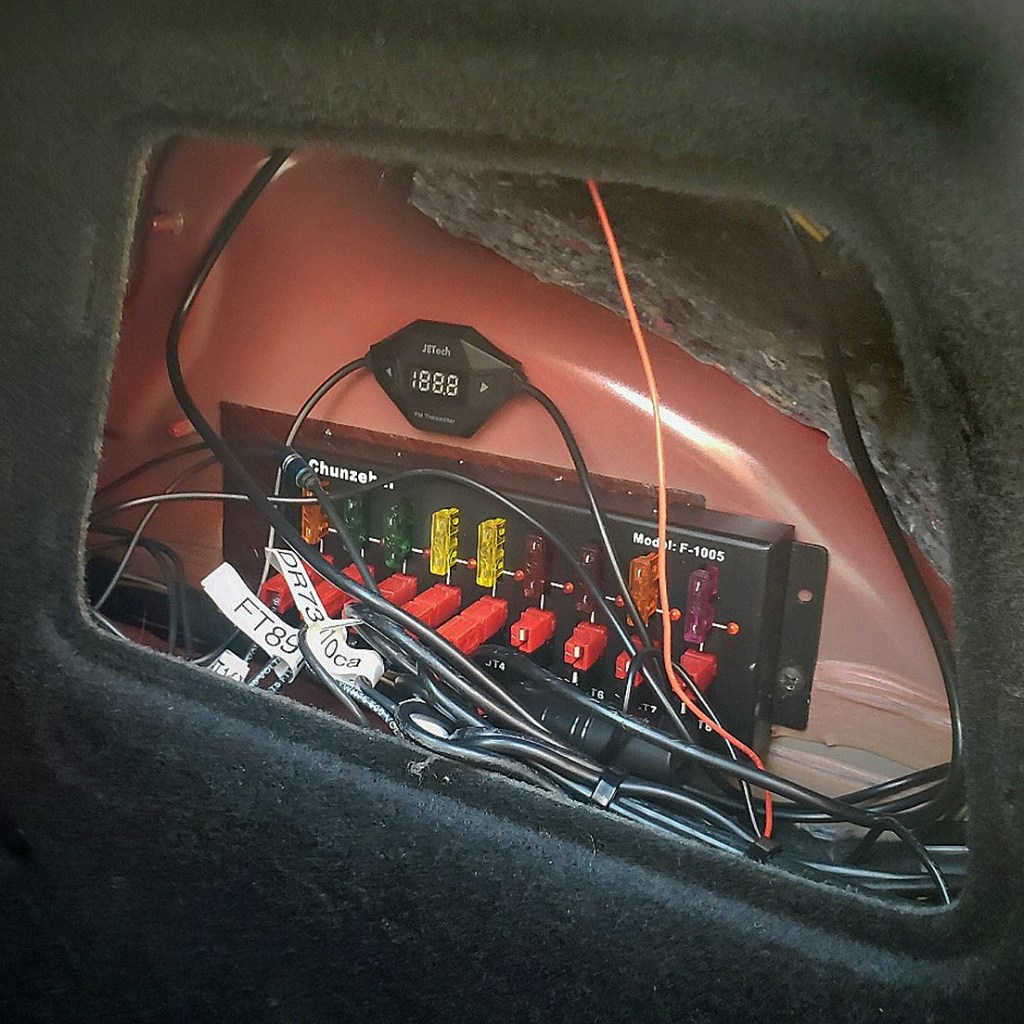
To power the radios, I ran a 10 AWGdirect line from the battery, through the firewall and under the center console back to the trunk area. The MINI has a nifty little carpeted access panel for access to the taillights so I used that space to mount a PowerPole distribution block at the back of the car to not only power the two rigs, but to provide a convenient place to plug in any other 12VDC gear I might want for a future outdoor radio event, say Field Day.
One concern that arose was that both radios had speakers built into the radio bodies, which were now in the trunk. Not so good for this old fart with failing hearing. I thought about adding an accessory speaker on the dashboard, but in such a small car, space comes at a premium and I’ve already cluttered things up with two new remote heads and microphones.
I decided to try a creative solution and bought one of those cheap-O FM modulators that let you transmit audio from your MP3 or CD player to your car stereo. I mounted the tiny modulator above the PowerPole block, connected it to the radio audio output jacks, and tuned it to 89.3 MHz, an unused frequency in my area. I programmed one of the FM memory buttons on the new Kenwood stereo to that same frequency, and now I get my ham radio audio through the stereo speakers.
For antennas, I went with the Yaesu ATAS-120 screwdriver antenna for HF and installed a lip mount on the rear tailgate. I was fully prepared to drill through the roof for a better mounting position with a much better ground plane, but my car has dual sunroofs – so that wasn’t a very viable option. On the other side of the tailgate you will find the 2M/70cm dual band antenna attached by another lip mount.

The last time I had a mobile installation was about a dozen plus years ago when I installed a Yaesu FT-857D in my 2002 Ford Focus sedan and used a four-magnet trunk lid mount with interchangeable mono band ham-sticks. I did have a lot of fun in those days working into Europe on 20 and 40 M after work while stuck in the parking lot that is rush hour on Route 128 outside of Boston.
When I did the Focus install, I took the matter of bonding seriously and used copper braid to bond the doors, hood, hood, and rear hatch to the main body. However, realizing that all of the doors should have a good ground by means of being bolted to the body, I haven’t yet bonded the doors on the MINI This SEEMS logical, but I don’t know – I welcome your insight and feedback here. I did add a beefy ground cable from the antenna mount to the rear hatch sheet metal for a better ground.

HOW DOES IT WORK YOU ASK?
So far, so good – I have made some initial HF contacts on 40M along the east coast and into Nova Scotia, have checked into ECARS on my morning errands, and I have also participated in the local Meriden Amateur Radio Club Tuesday Night 10M net.
I’m pleased so far with the performance, but I have discovered that the ATAS antenna tunes slowly – I may need to beef up the ground connection on the lip mount – and of course it’s placement is far from optimal. I may try some of my ham sticks left over from my first mobile installation with a mag mount on the roof to see how it compares. So far I’ve not noticed significant alternator/engine noise on receive, nor have I received any audio reports indicating whine on my signal. I did notice, however while transmitting on 10M, it causes the LCD screen built into my rearview mirror to flutter.
The bottom line is I’m quite pleased so far and look forward to making any necessary tweaks going forward as I make more contacts with my motorized MINI go-kit!

EPILOGUE… WHAT ELSE DID I DO TO MY MINI?
I mentioned that I did several upgrades/mods to my MINI Cooper this summer, besides the radio mods detailed above. In addition to the radio projects outlined above, here’s a list of the additional things I did to “Hubert,” my 2012 R56 MINI Cooper this summer…
I installed a Rockville RW10CA 10″ 800 Watt Slim Low Profile subwoofer in the trunk. I had underestimated the size of the subwoofer. Despite the words “slim” and “low profile” in the product description, I discovered it did not fit under the front seats, as originally planned and it occupied a lot of the limited available trunk space. My solution was to make it easily detachable and removable using PowerPole, RCA and RJ11 connectors.
I upgraded the horn. The car came with a very “un-MINI” trumpet horn set, and one of the two horns wasn’t functioning. I replaced the anemic horn with a FARBIN Loud Car Horn Super Tone 12V High Tone/Low Tone Metal Twin Horn Kit. Not only is it louder and grabs more attention, my MINI now has a more appropriate “meep-meep” horn sound.
I installed a pair of Wipac 5 1/2″ driving lamps. I always liked the way auxiliary driving lamps looked on both the classic and new MINI. I saved a significant portion of the cost by choosing Wipac over MINI lamps. The MINI lamps are expensive and make use of a proprietary mounting bracket that will not accept other manufacturer lamps.
I also attempted to upgrade the headlights. Like many MINI R56 owners, I felt the OEM halogen lamps were too weak. I purchased a set of aftermarket extra-bright LED low/high beam bulbs. The bulbs were simple to install, however the new LED headlights flickered incessantly. Apparently this is a fairly common occurrence that can be resolved by adding a resistive ballast to the circuit. I purchased a plug and play ballast set but was saddened that it did not completely resolve the flicker issue. So I’m back to the OEM headlights for the time being.
HAPPY MOTORING & 73 DE AB1DQ!
