

I have always been a big fan of the homemade Valentine – nothing says tradition to me than a handcrafted paper heart, embellished with lace, foil and/or glitter. I’ve made plenty of these paper hearts for my Valentine over the years, but for 2019 I wanted to take my game to the next level. In my experience, most anything can be improved by adding electronics – so why not the humble Valentine?
I started by building the Velleman MK101 Flashing LED Sweetheart Mini-Kit, a simple and fun build that took less an hour with only 9 resistors, 2 NPN transistors, 2 electrolytic capacitors and 28 red LEDs.

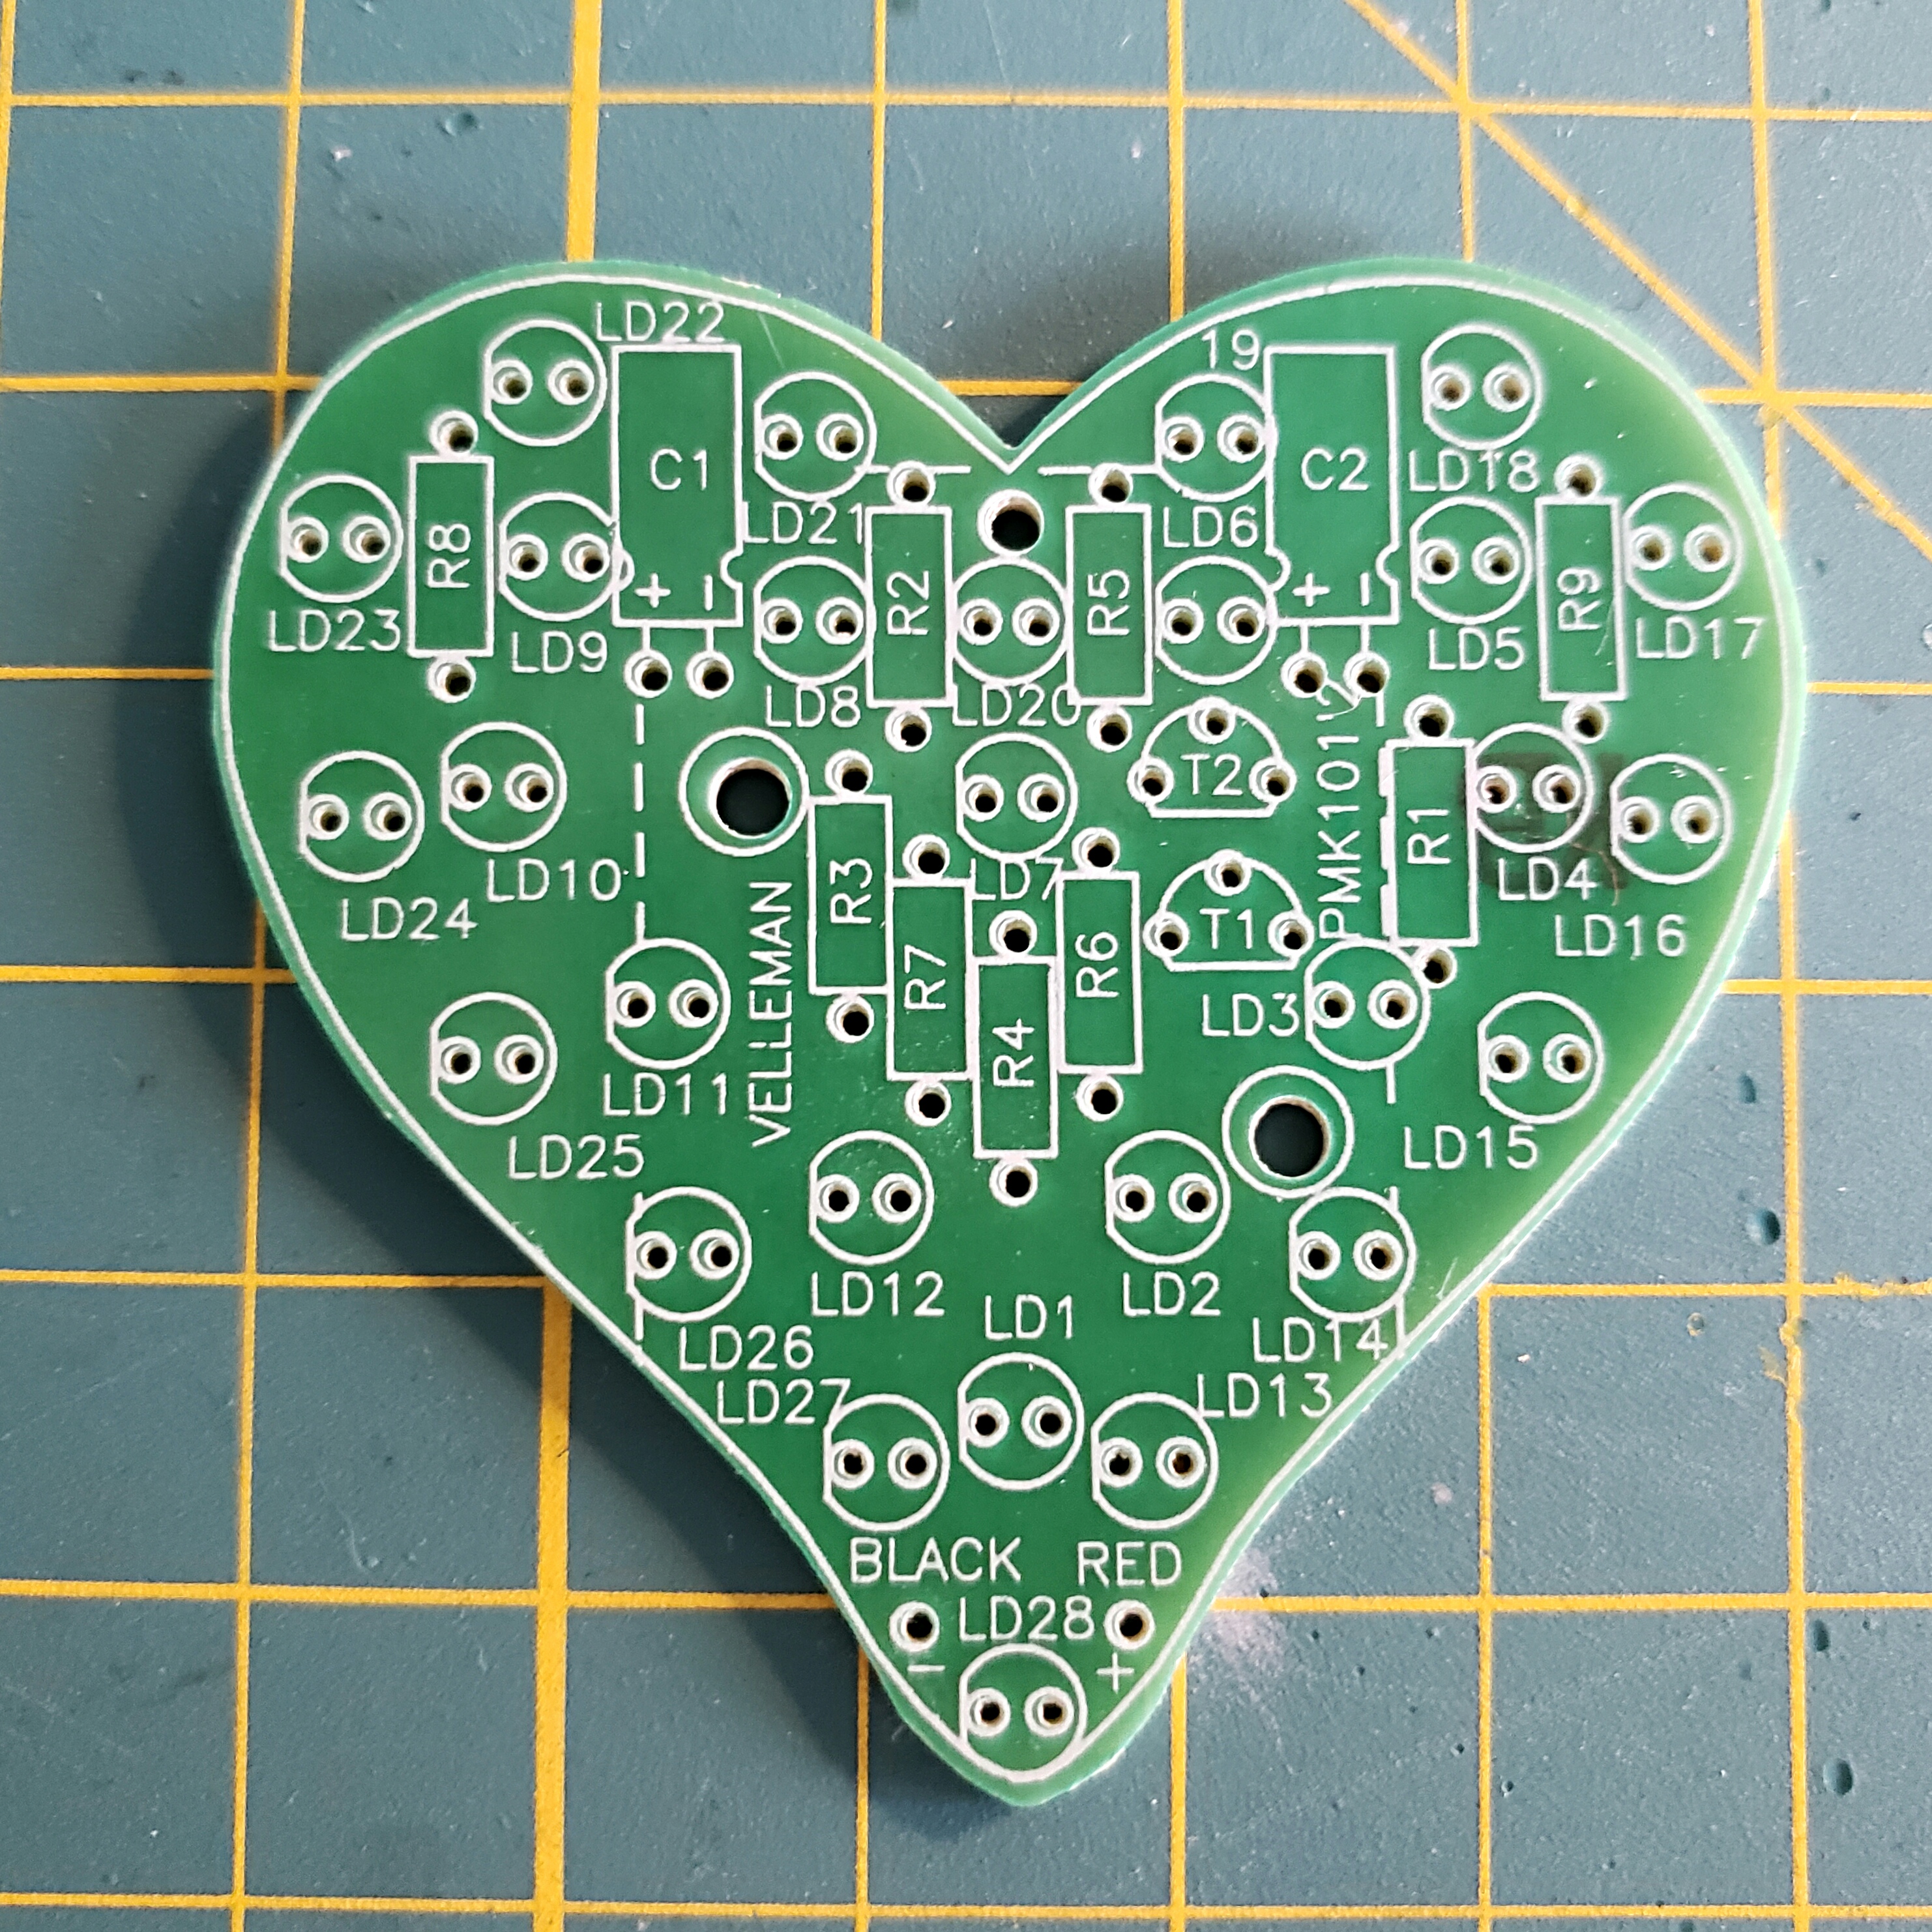


The trickiest part of the build was making sure that the polarity for each of the LEDs was correct. This wasn’t difficult as the cathode for all of the LEDs were oriented to the left side of the PCB, so it was just a matter of taking an extra moment for each LED to make a mindful check that the shorter lead was inserted on the left side of the board.

I attached the LEDs in four groups of seven each, again working slowly and double-checking each to make sure polarity was correct before applying solder.
When the moment of truth came to test the circuit, I was relieved that it worked. Despite working meticulously to install the LEDs with the correct polarity, it would be a real chore to identify any that were installed incorrectly after the excess leads were nipped off.

© Vellemen, Inc.
Now that the flashing heart was done, the next question was, “How do I present it to my beloved?” The circuit board doesn’t fit well in a paper envelope so I’d need something three dimensional. Cigars to the rescue!
One of the many nice things about being a cigar smoker is that if you’re any good at it, you will eventually collect a surplus of nice wooden boxes which make for great project cases. I had just the thing in my collection – a small nearly square wooden box that originally contained Erin Go Bragh Irish Creme Cigarillos (a delicious quick smoke, btw).
The Velleman heart was a perfect fit – I could easily mount it inside the box and use a NC push button switch to power the circuit when the box was opened. This would be a snap and yet there was plenty of room left over. Maybe too much room? So I started wondering – how I might use the free space to make this project even better?
After more reflection and more research online, I came up with the idea of turning this valentine project into a music box that would play “our song” [Moon River, by Andy Williams] when the box was opened.
SparkFun had what appeared to have just the thing I needed – an all-in-one Arduino based MP3 trigger kit – the Qwiic MP3 trigger. The board comes complete with an on board 1.4W Class-D mono amplifier, and it can read from a micro SD card, and be triggered to play with a single switch closure. The price was right too – just $19.95 as of this writing – so I placed my order.

The only problem I saw was the admonishment on the SparkFun website that the MP3 trigger board must NOT be powered by anything greater than 3.3 VDC. Yikes – the plot thickens!
There were two options for making the 3.3 volts for the MP3 board from the existing 9 volt battery. I could either use a linear regulator or a buck converter.
A buck converter is a little more sophisticated in design and it steps up current as it steps down voltage. A linear regulator is a simpler design and doesn’t reduce current but instead it dissipates as heat the voltage times the current drop.
Given my space constraints in the tiny cigar box and the overall simplicity of my project, I decided to use a linear regulator but first I needed to ‘do the math.’
The published documentation for the MP3 trigger states that the board has a current consumption of 40mA at standby and 150-300mA driving an 8 ohm speaker at full volume. The Velleman flashing heart kit documentation states it consumes 8mA and a Duracell 9 volt alkaline battery is rated for 500 mAH.
So, conservatively assuming the max current consumption of between 158 and 308 mA during full volume playback, the battery should last 1.62 – 3.16 hours. Since the Moon River MP3 is 2:44 long, I could expect at least 35 to 69 plays before the battery died. Ultimately as I did not change the stock volume setting of 10 (out of 32), the actual battery life should be much better than my conservative calculations.
Building the voltage regulator was a snap. The simple circuit calls for nothing more than adding a pair of capacitors to a TI 3.3V LM1117 voltage regulator chip.


Prototyping… 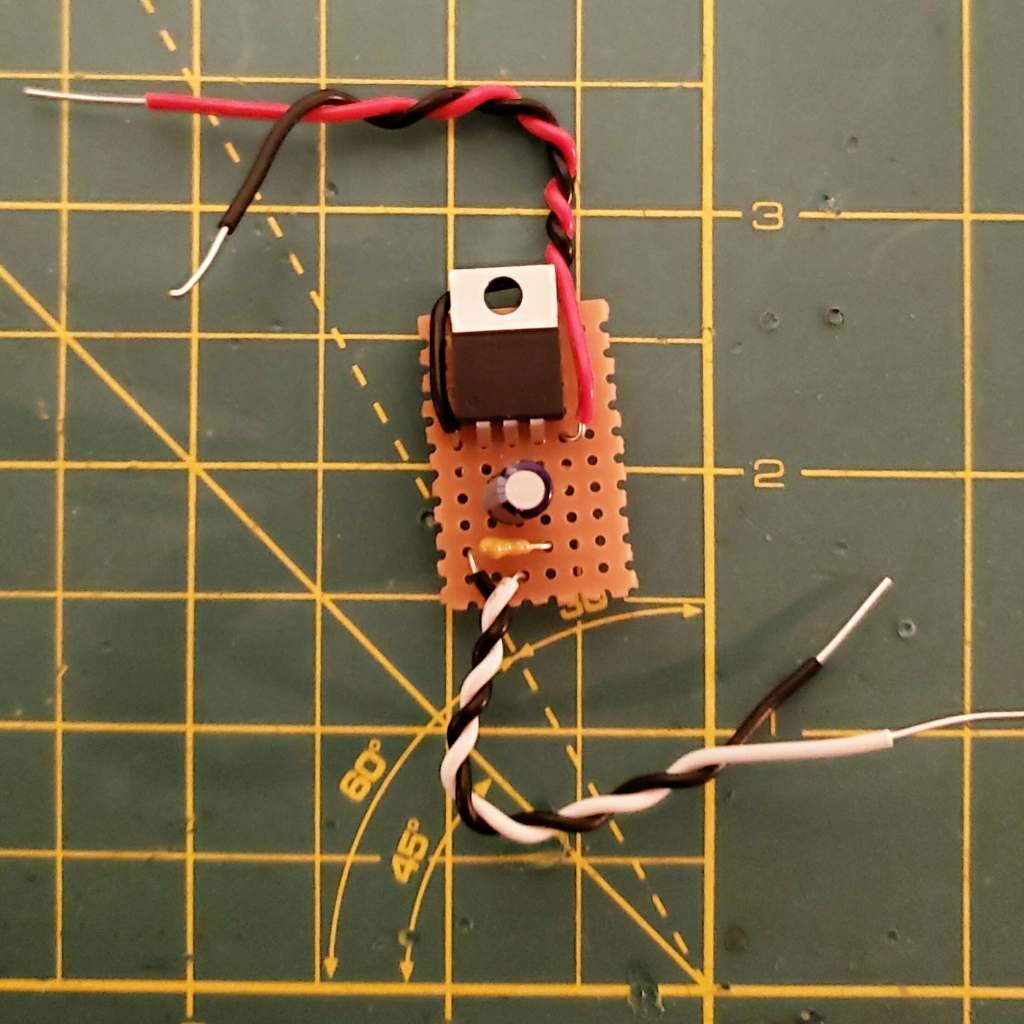
Finished board… 
3.3 VDC+
After I built and tested the voltage regulator circuit, I did not have to wait long for the Qwiic MP3 Trigger to arrive from SparkFun. It showed up just a couple of days later. along with the fresh microSD card and a USB C cable I also ordered.
According to the online documentation, when the No.1 pad on the board is shorted to ground, the Trigger will play the MP3 file saved to the SD card named T01.mp3.
I inserted the new SD card into the board and plugged it into my PC via the USB-C cable and Windows 10 immediately recognized the device as external device “E:” I was able to simply drag and drop a properly renamed copy of my Moon River MP3 from Google Music. So far, so good.
But, when I first tried to test play the MP3, there was no joy. The SparkFun website shows the device playing the T01.mp3 by shorting the proper contacts with a pair of tweezers, but this wasn’t working for me.
I studied the photo on the SparkFun website closely and then I realized my error. The board needs to be powered but disconnected from the PC. When I unplugged the board from the computer USB port and hooked it up to my voltage regulator circuit and shorted the number 1 contact to ground it worked perfectly!

My final concern was whether I would need to incorporate a second NC push button switch to trigger the MP3 after the board is powered up. The online documentation stated that the board may take up to 1500 ms to power up. I had hoped if I needed a second push button, I could place the first one closer to the front of the cigar box and the second closer to the hinge for adequate timing.
I wanted to see what happened if I applied power to the board with the No. 1. contact already shorted. Would the MP3 begin playing when power was applied?
YES Indeed! The MP3 automatically started playing in this configuration just as I had hoped. The music also stopped when power was disconnected, and would immediately start again from the beginning when power was reapplied. This would be absolutely perfect for my music box application as I could employ one NC push-button switch to provide power to both the heart circuit and the MP3 circuit causing the LEDs to flash and the music to play when the box was opened and stop whenever it was closed.
All that remained was mounting all into the cigar box. In determining the layout, I realized the biggest constraint was that changing the battery would be impossible if I used the built in battery clip on the back of the Velleman heart..

from the flashing heart board to facilitate battery changes.
I thus opted for moving the battery to an easily accessible spot on the left side of the box, making a simple battery holder by gluing a dowel snugly up against the battery. I attached a second 9V battery clip with the polarity leads reversed (red to black and black to red) to supply power the heart.
Everything else was mounted inside the cigar box using hot glue – not elegant but very practical. The power on push button was placed in the top left corner on the hinged side of the lid, the voltage regulator is on the bottom of the box near the back on the right side, and the MP3 trigger is cemented to the front right side. The MP3 board has a 3.5mm stereo jack which remains accessible if anyone wanted to plug in a pair of earbuds to hear the music in glorious stereo.
The mini 8 ohm speaker was attached to the front of the box using the 2 sided adhesive provided with the speaker.
I decided I did not want to refinish the little cigar box to make it look like anything other than what it is – an electronic valentine made on my workbench – this thing screams “James.” For an added touch of workbench authenticity, I made a valentine greeting for the lid with my Dyno label maker…using red tape, of course!
This was a great project and along the way I learned about voltage drop regulators. Working with the SparkFun micro controller board was fun easy and educational. I am aware that the board has many more features that I did not need for this project and that performance can be tweaked by editing the sketch in the Arduino IDE – something to consider for next time.
HAPPY VALENTINE’S DAY!
©2019 JMSurprenant

Best Valentines Day gift ever! xo
LikeLiked by 1 person
Thanks emcesq – she loved it and I loved designing and building it – a win/win!
LikeLiked by 2 people